





A rental can look clean at first glance and still lose a deposit over floors. Faint traffic lanes in carpet, sticky residue on vinyl, dull hardwood, or grout that has darkened over time can all affect a move-out inspection. This rental floor care checklist helps renters, property managers, and real estate professionals address the details that make a unit feel genuinely clean and ready for its next occupant.
Start With the Lease and the Move-In Record
Before cleaning anything, review the lease, move-in photos, and inspection notes. The goal is not to correct pre-existing damage that was documented when the tenant moved in. It is to return the floors in the condition required by the lease, allowing for normal wear.
Look for language about professional carpet cleaning, pet odors, stains, refinishing, or cleaning fees. Some leases require a receipt for professional service, especially when pets lived in the home. If the property manager supplied a cleaning standard, use it as the working plan rather than guessing what will pass inspection.
Take current photos before you begin. Photograph each room in natural light, including thresholds, corners, closets, and any areas of concern. This protects both sides if there is a question about condition later.
Rental Floor Care Checklist: Identify Every Surface
One cleaning method does not fit every floor. A product that cuts through grime on ceramic tile may leave a haze on laminate or damage a hardwood finish. Walk through the property room by room and identify the material before choosing products or equipment.
Carpet often needs the most attention because it holds tracked-in soil, fine dust, food spills, pet hair, and odors below the visible surface. Tile and grout need inspection for soap residue, grease, and discoloration. Hardwood should be checked for scuffs, dull finish, water marks, and scratches. Vinyl and luxury vinyl plank can collect adhesive residue and grime along the edges, while laminate needs careful moisture control to prevent swollen seams.
If you are unsure what a floor is made of, do not use an aggressive cleaner as a test. Ask the property owner, check leftover installation records, or consult a floor care professional. Replacing damaged flooring costs far more than taking a little extra time to confirm the material.
Clear the Room Before You Clean
A proper floor cleaning begins with access. Remove furniture, rugs, boxes, and other items so you can see the full condition of the floor. Vacant rental units are easier to clean thoroughly, but occupied homes can still be handled in stages.
Vacuum carpet slowly, especially around baseboards, under beds, and in closets. Dry soil is abrasive, and removing it first makes deep cleaning more effective. Sweep or vacuum hard surfaces with a soft-floor setting so sand and grit do not scratch the finish while you work.
Then inspect the floor in good lighting. Mark problem areas with painter’s tape or make a short room-by-room note. Common trouble spots include the entryway, hallways, the area in front of the sofa, under dining chairs, around litter boxes, and kitchen walkways.
Treat Stains and Odors at Their Source
Not every mark requires the same treatment. A surface spill may respond to a safe spot cleaner, while a stain that has reached the carpet backing may need professional attention. Scrubbing aggressively can fray carpet fibers, spread a stain, or leave a noticeably lighter patch.
Pet accidents deserve special care. The visible spot may be small, but odor-causing material can travel into the carpet padding or subfloor. Covering it with fragrance does not solve the issue, and it can become more noticeable once the unit is closed up for a showing. Use an appropriate enzyme treatment when the source is known, and allow enough dwell time for it to work.
For hard floors, avoid soaking seams and edges. Water that sits along hardwood boards, laminate joints, or loose tile grout can create a larger repair problem. Use only the amount of moisture needed, then dry the surface promptly with a clean towel or microfiber pad.
Deep Clean Carpet With the Right Method
Carpet is often where move-out cleaning falls short. Rental-grade vacuuming can improve appearance, but it cannot remove all of the oily, embedded soil that has settled around carpet fibers over months or years.
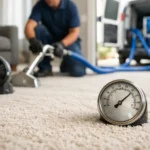
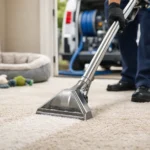
For heavily used carpet, professional truck-powered hot water extraction is a practical choice. It flushes soil from deep in the carpet and removes the cleaning solution with strong extraction rather than leaving excess moisture behind. When done correctly, it provides a deep clean while supporting faster drying times, an important benefit when a property needs to be shown or turned over quickly.
Ask the cleaner how they handle traffic lanes, spots, pet concerns, and drying. The lowest price is not always the best value if the work leaves behind residue or the carpet stays damp for too long. White Knight Carpet Cleaning uses truck-powered hot water extraction because it is a manufacturer-recommended approach that delivers a thorough clean while treating the home with care.
Carpet that has permanent staining, burns, bleach marks, or severe wear may not return to a like-new appearance. Professional cleaning can improve cleanliness and presentation, but it cannot reverse physical damage. Clear documentation and an honest conversation with the property manager are better than promising a result the carpet cannot deliver.
Clean Hard Floors Without Damaging Them
Tile is durable, but grout is porous and often shows age first. Start with a safe cleaner suited to the tile type, then focus on grout lines, corners, and the space around toilets and appliances. Avoid acidic products on natural stone such as marble, travertine, or limestone. These materials can etch, leaving a dull or uneven finish.
Hardwood requires restraint. Use a cleaner approved for the floor’s finish and a lightly damp microfiber mop, never a soaking wet mop. Dullness may be residue from improper products rather than a need for refinishing. Deep scratches, cupping, and gaps are maintenance issues that should be reported instead of hidden with waxes or oily polish.
Vinyl, luxury vinyl plank, and laminate generally respond well to gentle cleaning and careful drying. Skip abrasive pads, steam mops unless the manufacturer specifically allows them, and products marketed as shine restorers. They can leave a film that attracts dirt or make the floor slippery for the next resident.
Complete the Final Move-Out Walkthrough
Once the floors are dry, inspect them again from several angles. Daylight and overhead lighting reveal different issues, so use both when possible. Walk the unit slowly and check transition strips, closet floors, stairs, baseboards, and edges where a quick cleaning is easy to miss.
Before returning keys, make sure you have completed these final items:
- Vacuum or sweep all rooms, including closets and under removable appliances.
- Remove tape, furniture pads, rug residue, and other adhesive marks.
- Confirm carpets are dry before replacing furniture or closing up the unit.
- Save receipts and take final photos after cleaning is complete.
- Report damage that cleaning cannot correct rather than attempting a risky repair.
For property managers, this same process creates a more consistent turnover standard. A clean, dry, odor-free floor helps listings photograph better, makes showings more inviting, and gives new residents confidence that the home was prepared with care.
A good move-out cleaning is not about making every floor look brand new. It is about leaving the property clean, safe, properly cared for, and ready for the next chapter. When a floor needs more than routine cleaning, addressing it early gives you more options and fewer surprises at inspection time.